The health and longevity of your sod depend on what lies beneath. Without proper soil testing, even the highest-quality sod can struggle to survive. At Sodding Canada, we start every project with a thorough soil assessment to ensure the ground is nutrient-rich, properly balanced, and ready for strong root development.
Key Takeaways
- pH, nutrients, and compaction levels affect sod health
- Soil kits, lab analysis, and physical tests reveal vital details
- Soil needs tailored treatment due to weather extremes
- Sodding Canada offers full soil prep and sod installation services
Why Soil Testing Is Important Before Installing Sod
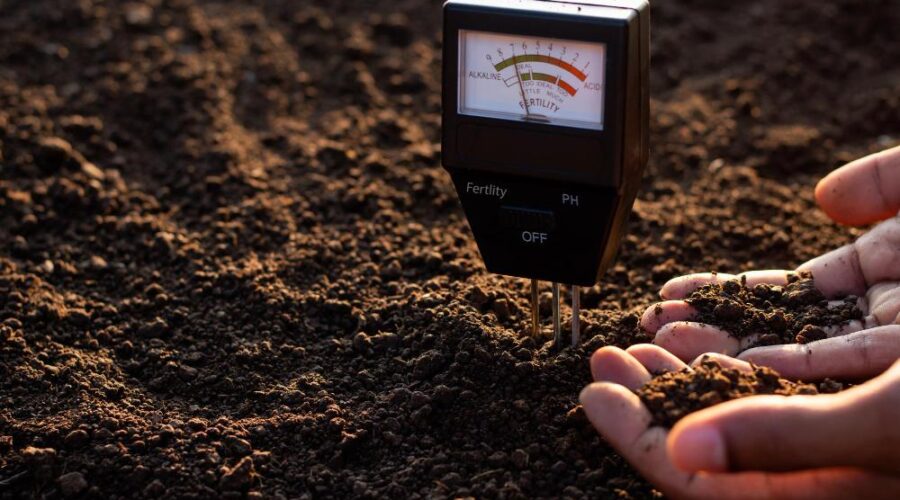
Soil testing is the first step in preparing your lawn for sod. Without it, you might be unaware of issues such as pH imbalances, nutrient deficiencies, or poor drainage that could hinder your sod’s growth and establishment. In a diverse climate, where weather conditions and soil quality vary significantly across regions, understanding your soil’s composition is crucial.
Here’s why soil testing is so important:
- Nutrient Levels: Testing helps identify nutrient deficiencies or excesses in your soil. Sod needs essential nutrients like nitrogen, phosphorus, and potassium to establish healthy roots. If your soil lacks these nutrients, your sod may struggle to grow properly.
- Soil pH: The soil’s pH level influences how effectively nutrients are absorbed by the roots. Soils that are too acidic or too alkaline can prevent sod from absorbing essential nutrients. For example, some areas tend to be more alkaline, while some regions have slightly more acidic soils.
- Drainage Issues: If your soil has poor drainage, water may pool on the surface, depriving your sod roots of oxygen and promoting root rot. Proper drainage is vital for long-term sod health.
- Improved Sod Growth: A soil test provides a roadmap for improving your soil’s structure and fertility, ensuring the best possible conditions for your sod to root and flourish.
Steps to Test Soil Before Installing Sod
1. Choose the Right Time for Soil Testing
The best time to test your soil is ideally several weeks before you plan to install sod. This gives you ample time to address any issues the test reveals, such as adding fertilizers or adjusting pH levels. Soil testing can be done any time of year, but it’s most effective in the late fall or early spring when the soil is neither too wet nor too dry.
2. Collect Soil Samples
The accuracy of your soil test depends largely on how you collect the samples. Follow these steps for proper soil sampling:
- Use Clean Tools: Ensure that all tools, such as shovels, spades, and buckets, are clean and free from any contaminants that could affect the test.
- Select Multiple Sampling Locations: For a reliable result, collect soil from several locations across your yard. This will give you an overall picture of the soil’s health, as some areas of your lawn might have different soil conditions than others. Ideally, sample 6 to 10 locations in your lawn.
- Dig to the Right Depth: Use a shovel to dig down about 4 to 6 inches (10-15 cm), which is the root zone where most grass will grow. The goal is to collect soil from the depth where sod roots will penetrate.
- Mix the Samples: After collecting soil from multiple spots, combine the samples in a clean bucket. Mix the soil thoroughly to get a uniform sample that reflects the overall condition of your lawn.
- Dry the Soil: If the soil is wet, spread it out on a newspaper or plastic sheet to dry before sending it off for testing. Wet soil can skew test results.
3. Send the Sample for Testing
Once you’ve collected your soil sample, it’s time to have it tested. You have two primary options:
- Local Agricultural Extension Offices: Many provinces have agricultural extension services that offer soil testing at a relatively low cost. These offices provide detailed reports and often include recommendations for soil amendments based on the test results.
- Private Soil Testing Laboratories: There are private labs that specialize in soil testing. These labs typically provide more in-depth reports and may offer faster turnaround times, but they are usually more expensive than public extension services.
Regardless of which method you choose, make sure to follow any instructions provided by the testing facility. Most labs will ask for a minimum amount of soil, usually about 1-2 cups, and may provide you with specific guidelines on how to package and send the sample.
4. Understand the Soil Test Report
Soil test reports may seem complex, but they are easy to understand once you know what to look for. Here’s what to look for in a typical soil test report:
- Soil pH: Ideally, the pH of your soil should fall between 6.0 and 7.0 for most types of sod. A pH below 6.0 indicates acidic soil, while a pH above 7.0 means the soil is alkaline. If your pH is out of balance, you may need to add lime (for acidic soils) or sulfur (for alkaline soils) to adjust it.
- Nutrient Levels: Look for the levels of key nutrients:
- Nitrogen (N): Essential for leaf and shoot growth. Low levels may result in poor sod establishment.
- Phosphorus (P): Crucial for root development, especially in the early stages after sod installation.
- Potassium (K): Supports overall health and disease resistance. Deficiency can make sod more susceptible to pests.
The report will indicate whether these nutrients are deficient, adequate, or in excess. Your soil test will likely provide recommendations on which fertilizers to apply to correct any imbalances.
- Organic Matter and Texture: Organic matter (compost, decomposed plants) is vital for soil health, as it improves drainage, aeration, and nutrient retention. If your soil lacks organic matter, adding compost or other natural materials can help enhance its structure and overall health. The test may also provide insight into the soil’s texture (clay, loam, sand), which affects water retention and root development.
5. Amend the Soil Based on Test Results
Once you receive your soil test results, it’s time to amend the soil as needed:
- Adjusting pH: If your soil is too acidic or too alkaline, adjust the pH using lime (to raise the pH) or sulfur (to lower it). These amendments usually need time to break down, so apply them at least a few weeks before sod installation.
- Adding Fertilizer or Compost: If the test reveals nutrient deficiencies, you can add fertilizers based on the recommendations. For example, if phosphorus is low, a phosphorus-rich fertilizer like bone meal may be beneficial. Adding compost will help boost soil structure and nutrient levels, particularly in heavy clay soils.
- Improving Drainage: If the soil test shows poor drainage, consider adding organic matter or sand to improve aeration. In extreme cases, you may need to install a drainage system or consider laying sod in raised beds.
6. Prepare the Soil for Sod Installation
After addressing any soil issues, it’s time to prepare the soil for sod installation:
- Till the Soil: Lightly till the soil to mix in any amendments and ensure that it’s loose and well-drained.
- Level the Soil: Smooth out the soil and fill in any low spots to create a flat surface.
- Water the Soil: Water the soil thoroughly before laying sod to help the nutrients settle and ensure moisture retention for the new sod.
Conclusion
Testing your soil before laying sod isn’t an extra step, it’s the foundation of your lawn’s future. In some climates, precision matters. From nutrient balance to compaction correction, every detail shapes how well your sod will root, grow, and thrive. Reach out to us today for expert soil testing and customized sod installation services built for your local conditions. Let’s create a lawn that’s not only beautiful but built to last.
FAQs:
How do I know if my soil is ready for sod?
If your soil has a balanced pH (6.0–7.0), drains well, and is nutrient-rich with no compaction, it’s ready for sod installation.
Can I lay sod without testing my soil?
You can, but it’s risky. Without knowing pH, nutrient levels, or structure, sod may not root properly, leading to waste and rework.
What should I do if my soil is too acidic?
Apply lime to raise the pH gradually. The required amount varies based on the existing pH level and the soil’s texture. A lab report offers precise recommendations.
How long before sod installation should I test the soil?
Test your soil 2 to 4 weeks before sod installation. This allows time to amend any imbalances and retest if needed.
Is professional soil testing better than DIY kits?
Yes. Professional labs provide detailed insights, including micronutrient levels and recommendations, especially valuable for large or complex yards.
Does Sodding Canada offer soil correction services?
Absolutely. We provide grading, compost application, aeration, and full prep as part of our Sodding Services.