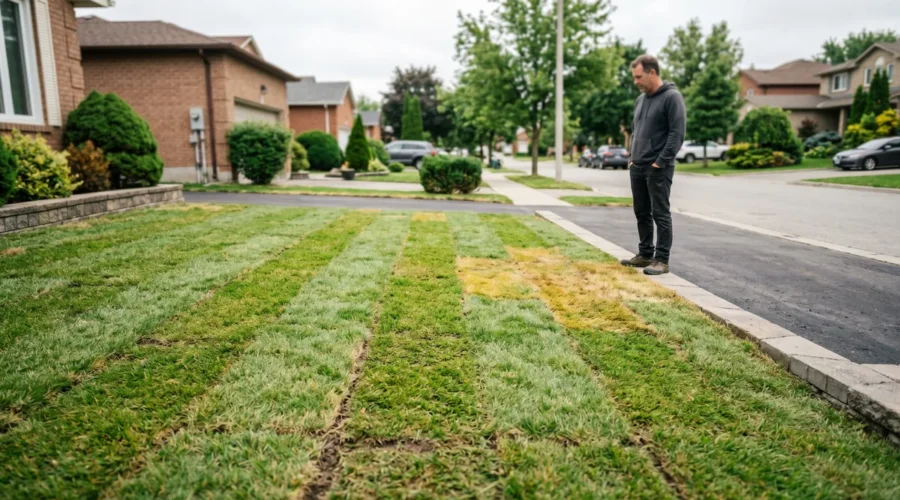
If you are frustrated because your new sod is not taking root two weeks after installation, the good news is that most rooting problems are entirely fixable. The bad news? Your window to save the grass is closing fast. Between day 10 and day 21, sod is either actively rooting into the soil or slowly dying. In our experience, five specific issues account for almost every failed lawn we inspect in the GTA.
This guide walks through exactly how to diagnose your turf and what immediate actions to take. For general sod replacement and repair services, we cover the GTA and can replace a failed installation if it is past saving.
We will cover the lift test (the diagnostic every homeowner can run in 30 seconds), the five most common rooting failures, the watering pattern that actually works, and when the lawn is truly done, and it is time to relay.
The 30-second lift test: is your sod rooting?
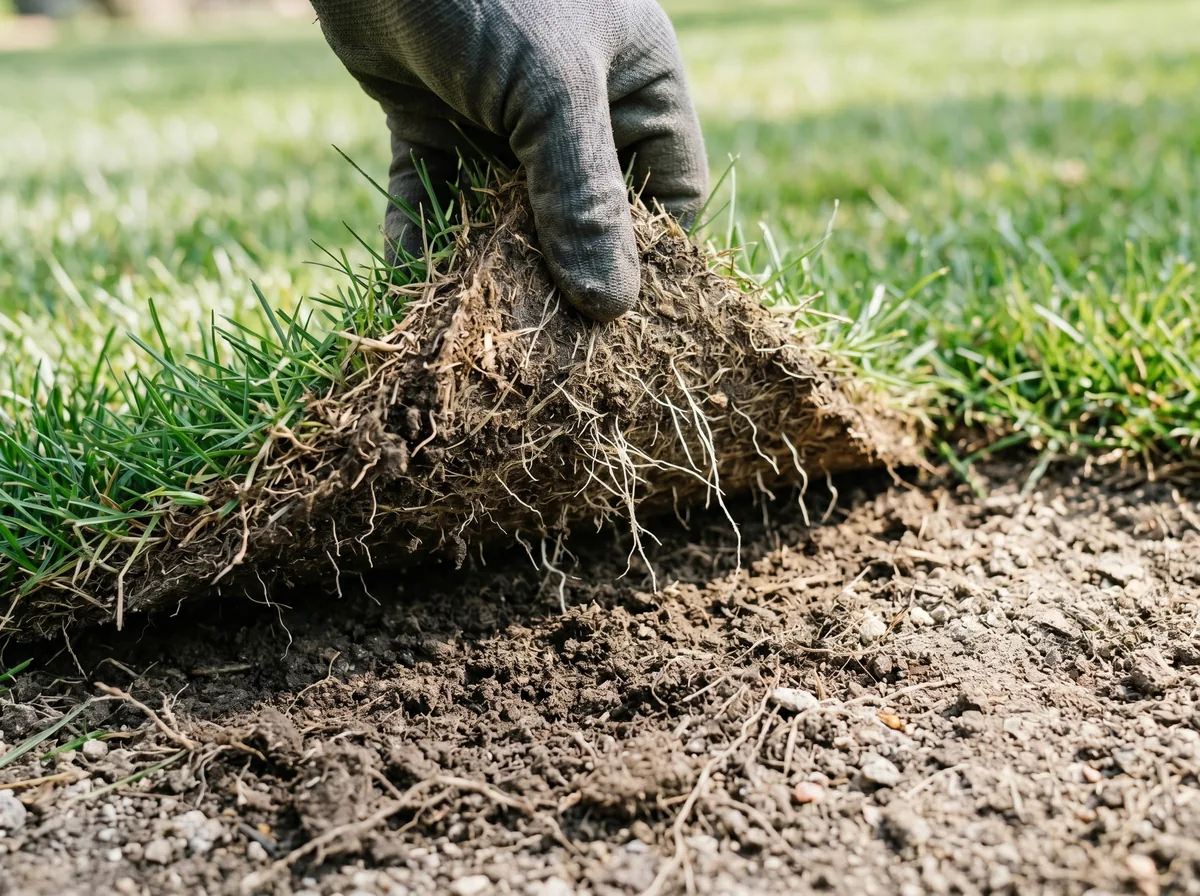
At day 10 to 14 after installation, walk to any edge of the new lawn and gently lift a corner of one sod piece. If a few thin white roots are reaching into the soil and the piece resists lifting, the sod is rooting normally. If the piece lifts like a rug, with no visible root attachment to the soil, the sod has not started rooting and something is wrong.
Do the test in three spots: a shaded area, a sunny area, and a high-traffic area near where anyone walks. Rooting often varies by location even within a single lawn. The spot that failed tells you what environment caused the problem.
Reason 1: Underwatering (the most common cause)
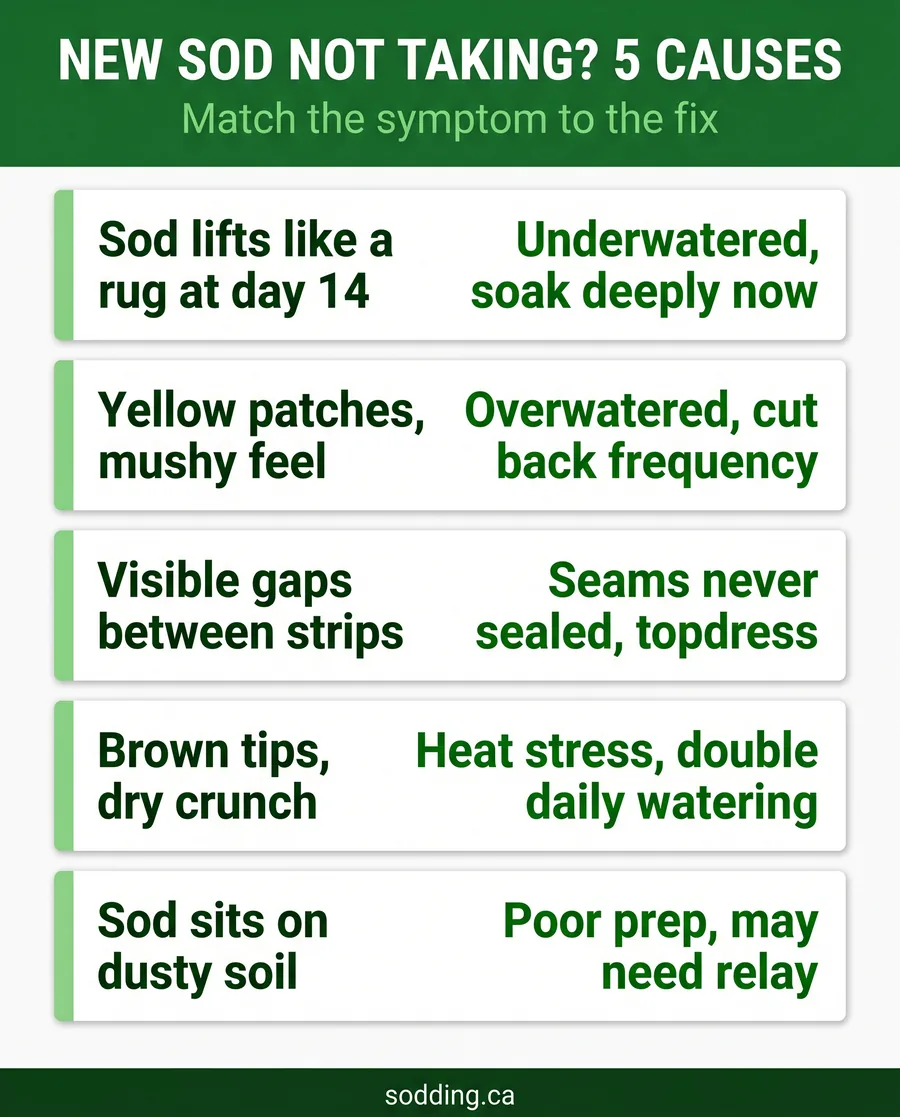
Underwatered sod is the number one reason for failed rooting in the GTA. The symptoms: sod lifts like a rug, leaf blades feel crunchy, edges are curling up, overall colour is fading from green to grey-green. This happens most often on hot weeks when the lawn was installed and the homeowner underestimated how much water fresh sod needs.
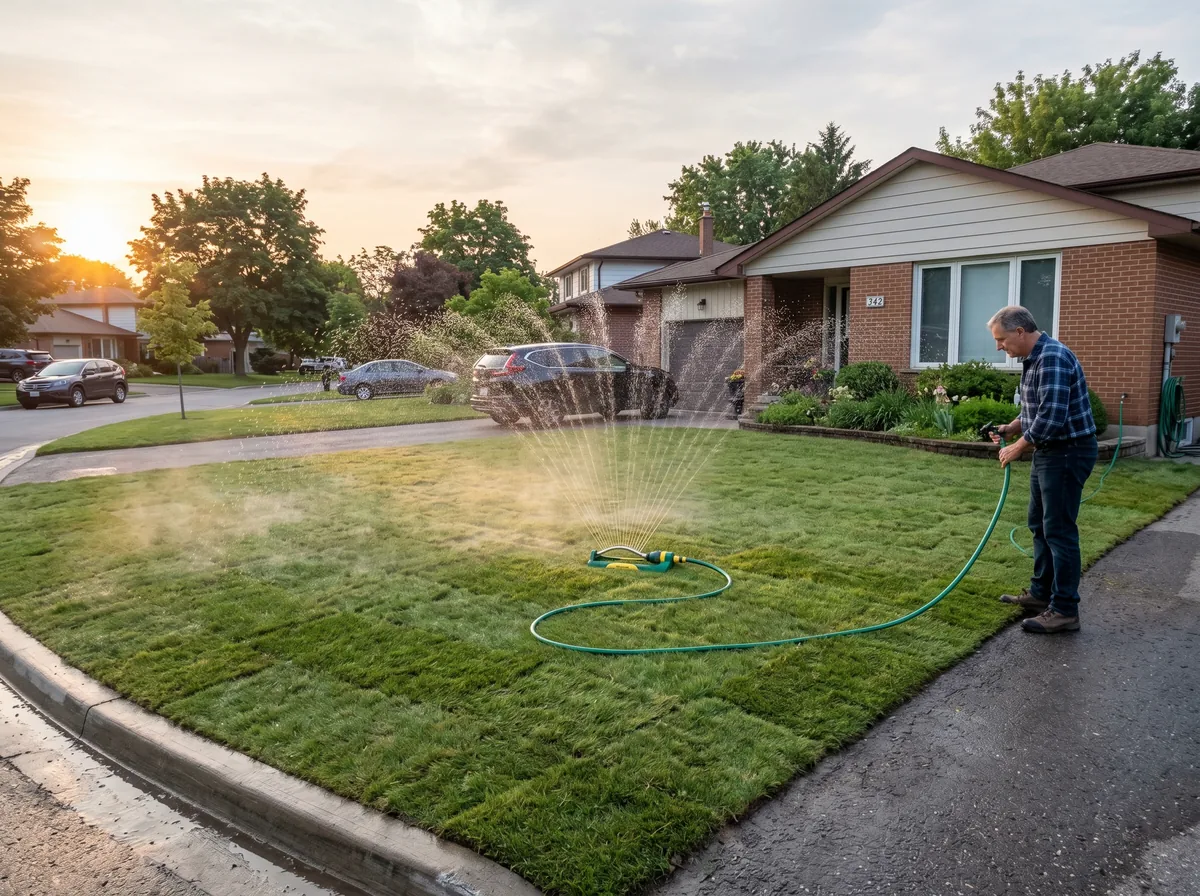
The fix: Water deeply now. Set sprinklers to run for 20 to 30 minutes, twice a day (morning and early afternoon), for at least 5 to 7 days. The goal is to re-saturate the soil below the sod so roots have moisture to grow into. After the first week of recovery, taper to once a day for the following week, then every other day going into week 4.
Warning sign that it is too late: Sod that has gone from green to brown and stays crunchy even after 3 days of heavy watering. Crunch means the blades have died. The crowns may still be alive, but recovery is uncertain.
Reason 2: Overwatering (more common than people admit)
The symptoms of overwatered sod look similar to the symptoms of dying sod, which is why this is so confusing: yellow patches, mushy underfoot, a sour smell, and a spongy feel when you press the surface with your hand. Fungal disease often sets in around day 10.
The fix: Cut back watering immediately. Drop to once a day for 15 minutes and move the watering to early morning only. The lawn needs to dry between waterings to push roots downward in search of moisture. Constant saturation keeps roots shallow and creates the conditions for fungal disease.
If yellow patches have already shown up, do not re-water them. They need to dry out, not get more water. Give them 3 to 4 days of reduced irrigation and see if colour returns.
Reason 3: Gaps between sod strips that never sealed
If the seams between sod strips are visible (gaps you can see from 6 feet away), the pieces never made full contact with the soil underneath and the roots have nowhere to go. Gap seams also dry out faster than the middle of a sod piece, so the edges brown first.
The fix is topdressing. Spread a quarter-inch layer of fine topsoil across the entire lawn and sweep it into the seams with a stiff push broom. The topsoil fills the gaps, gives roots material to grow into, and seals the edges. Water lightly after topdressing to settle the soil.
If your sod is still lifting like a rug after topdressing, the seams are not the only issue and you probably have a watering problem too. Fix both.
Reason 4: Heat stress during installation
Sod laid during a heat wave (28 degrees Celsius or hotter, with little cloud cover) takes a significant beating. The sod can lose moisture faster than the roots can pull it back in, and the blades start dying from the tips down. Symptoms: green centre with brown tips, brittle feel, curl at the leaf edges.
The fix: Double the watering schedule. Water 3 times a day for 15 minutes each until the heat breaks. Keep early morning water most generous, mid-day light, early evening moderate. Avoid nighttime watering, which invites fungal disease.
Heat-stressed sod often recovers fully if caught early. Brown tips grow out as new blades emerge from the crown. You may need a gentle mow at day 21 to remove the dead tip layer and encourage fresh growth.
Reason 5: Poor site prep underneath the sod
The hardest problem to fix is bad prep. If the sod was laid over dense compacted subsoil, over a half-inch of old thatch, or over landscape fabric that was never removed, roots literally have nothing to grow into. The symptom: sod lifts easily even at week 3, and underneath it looks like dry powder or a crust.
The fix is often full relay. A thin topdressing will not save a lawn laid over a bad base. If more than 30 percent of the lawn is affected, budget for a partial or full sod replacement and make sure the next crew rips the base to at least 3 inches, amends with fresh topsoil, and grades properly before relaying.
If you are in this situation and your sodding company offered a rooting warranty, now is the time to call them. Reputable GTA installers back their work for 30 to 60 days. For guidance on evaluating installers, Landscape Ontario’s professional contractor directory lists certified members across the province.
Recovery timeline: When to worry, when to wait
Rooting failures have a natural timeline. Knowing what is normal vs what is a red flag saves a lot of anxiety:
- Days 1 to 7: Sod should look green, slightly wilted, possibly with brown edges where moisture is lowest. This is normal.
- Days 7 to 14: Colour deepens, blade edges firm up, first signs of new growth. The lift test at day 14 should show thin white roots grabbing soil.
- Days 14 to 21: Full green colour, roots visible at edges, sod resists lifting. If this is not happening, you have 3 to 5 days to fix the problem before the sod dies.
- Days 21 to 30: First mow. Roots are 1 to 2 inches deep. Lawn tolerates foot traffic.
- Days 30+: Established lawn. Root system reaches 3+ inches over the next 6 weeks.
If your new sod has passed day 21 and still is not rooting, a partial or full relay is usually cheaper than trying to rescue the original install. Sodding Canada installs and replaces lawns across the GTA, with rooting warranty on every job. For a free assessment of a struggling lawn, use our booking form or reach out via the contact page.
New sod rooting troubleshooter – free PDF download
A printable one-page diagnostic so you can walk the lawn and identify the problem in 10 minutes.
Download the free guideFrequently asked questions
How long does it take for new sod to root?
Initial rooting begins at day 7 to 10 and is visible at day 14. Full rooting depth of 2 to 3 inches takes 21 to 30 days. A lift test at day 14 should show thin white roots reaching into the soil and the sod resisting peel-up.
Why is my new sod turning yellow?
Two causes dominate. Overwatering creates yellow patches that feel spongy and smell sour – cut back watering immediately. Nitrogen stress produces uniformly pale colour across the whole lawn – a light starter fertilizer application at week 3 fixes it. Heat stress produces yellow tips with green centres – water 3 times a day until the heat breaks.
Can I save new sod that has not rooted after 2 weeks?
Usually yes, if you catch it before day 21. Underwatered sod recovers with deep watering 20 to 30 minutes twice daily for a week. Overwatered sod recovers by cutting back to once-daily morning watering. Sod laid over bad prep is harder to save and often needs relay. The lift test at day 14 tells you which problem you have.
Should I walk on my new sod?
No traffic for the first 14 days. Roots are too fragile. After day 14, essential traffic only (turning sprinklers, spot-checking). After day 21, light traffic with shoes is fine. Full use (including pets and kids running) from day 30 onward.
What does a good sod installer do differently?
Proper prep, honest watering instructions, and a written warranty. Good installers rip the subgrade to at least 3 inches, amend with fresh topsoil, grade for drainage, press seams tight on install, and hand you a written watering schedule for the first 30 days. Most back their work with a 30 to 60 day rooting warranty.